
👋 Hey Future Innovator!
Do you like robots? Lights? Games? Machines that move and think?
Guess what? You can build them — using Arduino!
🤔 What is Arduino?
Imagine a tiny robot brain — small enough to fit in your hand 🧠🟦
It cannot talk or think like humans… but you can teach it!
Arduino is a small programmable computer that can:
✨ Turn on lights
✨ Move motors
✨ Detect sound
✨ Measure temperature
✨ Make mini robots
✨ Control sensors
It is like becoming a robot magician 🪄 — your code is the magic spell!
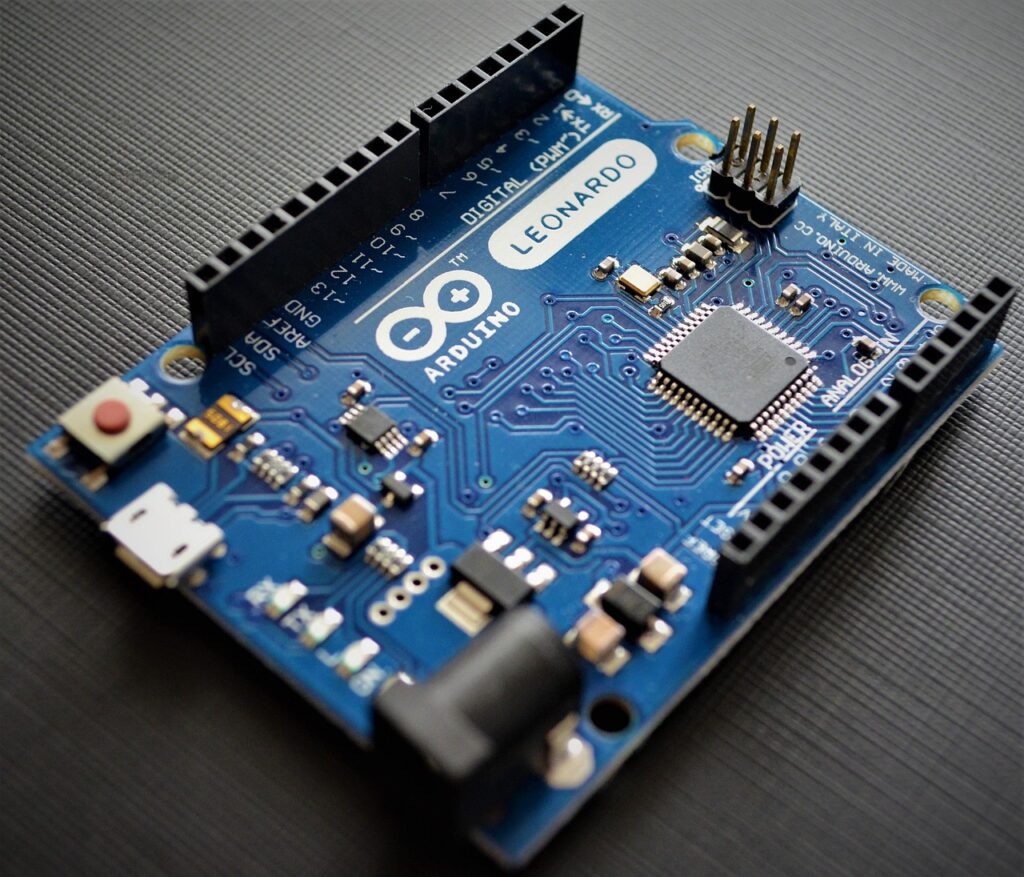
🧩 Arduino Board — A Quick Tour
Here’s what an Arduino UNO looks like (most kid-friendly model):
| Part | What it does (Kid friendly) |
|---|---|
| 🟩 Power Pins | Give energy to sensors & devices |
| ⚡ 5V & 3.3V Output | The “battery” ports |
| 🔌 USB Port | Connect to computer for coding |
| 🧠 Microcontroller | The brain that stores your code |
| 🟨 Digital Pins (0–13) | Used to control ON/OFF devices like LEDs |
| 🟥 Analog Pins (A0–A5) | Used to read sensors (temperature, light etc.) |
| 🔄 Reset Button | Restart the brain if something goes wrong |
📌 Kids Learning Message:
Learning Arduino is like learning how to speak to this robot brain!
🧰 What do we need to start?
| Item | Why we need it |
|---|---|
| Arduino UNO board | The brain |
| USB Cable | Connect to laptop for coding |
| LED | To see lights |
| 220Ω resistor | To protect the LED (safety helmet 😎) |
| Breadboard | Playground for electronics |
| Jumper Wires | Roads to connect everything |
🧪 Experiment 1 — Let’s Make a Light Blink ✨
This is the Hello World of robotics!
🔌 Step 1: Connect the LED
- Connect long leg of LED ➜ Pin 13
- Connect short leg ➜ With a resistor ➜ GND
🧠 Fun Tip:
Long leg = Positive = needs power
Short leg = Negative = goes to ground
💻 Step 2: Write Your First Code
We will use Arduino IDE (a software where you write code!)
Paste this code:
void setup() {
  pinMode(13, OUTPUT);  // Tell pin 13 it will give output
}

void loop() {
  digitalWrite(13, HIGH); // Light ON
  delay(1000);            // Wait 1 second
  digitalWrite(13, LOW);  // Light OFF
  delay(1000);            // Wait 1 second
}
Now Upload ⬆️ to Arduino.
✨ Blink! Blink! Blink!
You’ve created your first robot light show 🎉
🧠 What Did You Learn?
| Concept | Meaning |
|---|---|
pinMode | Tells Arduino how a pin will behave |
OUTPUT | The pin will control something |
digitalWrite | Turn things ON or OFF |
delay | Stop for some time |
🎯 Superpower Unlocked: You can now talk to electronics!
🦾 Chapter 2: Input + Output — Making Smart Robots
Robots are smart only when they can sense things.
We will use: Push Button 🔘
🧪 Experiment 2 — Press Button to Turn On Light
📍 Wiring Steps:
- Button one side → Pin 2
- Other side → GND
- LED → Pin 13 (same as first experiment)
💻 Code:
int button = 2;

void setup() {
  pinMode(13, OUTPUT);
  pinMode(button, INPUT_PULLUP);
}

void loop() {
  int buttonState = digitalRead(button);

  if(buttonState == LOW) {
    digitalWrite(13, HIGH);
  } else {
    digitalWrite(13, LOW);
  }
}
📝 Logic:
- Button pressed → State becomes LOW
- Robot brain says: “Turn on the light!”
👏 Now the robot responds to your actions!
🔍 Chapter 3: Sensors — Robot Eyes & Ears
Sensors are like 5 senses for your robot:
| Sensor | Sense | Example Project |
|---|---|---|
| LDR | Eyes (light) 👀 | Night-lamp |
| Temperature Sensor | Feel heat 🌡️ | Room AC monitor |
| Ultrasonic Sensor | Distance 🦇 | Crash-avoiding robot |
| Microphone | Hearing 👂 | Clap switch |
| IR Sensor | Detect objects 🤖 | Line follower |
🎮 Chapter 4: Mini Projects Kids Can Build
| Project | Skill | Fun Level 😎 |
|---|---|---|
| Automatic Night Lamp | Light sensing | ⭐⭐⭐⭐ |
| Traffic Light Model | Timing & LEDs | ⭐⭐⭐⭐⭐ |
| Clap ON/OFF Light | Sound sensor | ⭐⭐⭐⭐ |
| Smart Dustbin | Robotics | ⭐⭐⭐⭐⭐ |
| Obstacle Avoider Robot | Motors + sensors | 🌟🌟 Premium |
🧒 Learning with Feelings 💙
Robotics is not just machines…
It’s about confidence, creativity, courage!
💡 If something doesn’t work…
That’s a chance to try again
— just like scientists do! 🧑🔬
You fail only when you stop trying 💪
📝 Kid Worksheet (Printable)
✔ What does Arduino do?
✔ Which pin gives power to sensors?
✔ What happens if delay(5000)?
✔ Draw your circuit!
✔ Write your dream robot idea!
🦺 Safety Rules for Young Engineers
| Rule | Why |
|---|---|
| Never touch USB plug with wet hands | Electric safety |
| Don’t connect LED without resistor | LED might burn |
| Ask before connecting motors | They need more power |
| Keep wires neat | Avoid short circuits |
🛡️ Safety makes you a professional engineer!
🎯 Congratulations!
You have completed:
- Arduino basics ✔
- First program ✔
- First smart system ✔
You are officially a Junior Robot Maker 🤖🌟